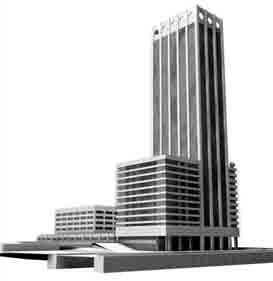
Digital illustration

Hello!

Imaging in Pencil Sketch
Lesson 1

After we have prepared the preliminary model of the object, it is recommended to present the client with a pencil sketch image.
On how to execute an image with this method, turn to the next lesson.
We have to draw a tri-dimensional model of the object and prepare it for processing with  "PhotoShop", which will create the actual desired image.


In order to create the contours of the project, we should use the PhotoShop - Find Edges effect, which you can find under Stylize - Filters. This effect has a noticeable drawback, in that it provides the user with limited possibilities.

In order to create in the object a depth effect and graphics that imitate hand-made drawing, we should combine different lines. This can be done by using the "Diffuse Glow" command in the "Distort" menu. This command enables us to add a background to the drawing and attain a blurring effect.


When using the "Diffuse Glow" command, we can take advantage of the "Fade" option. This option opens a window that enables us to merge drawings and define criteria for transferring colours from one drawing to the other. This way we can merge drawings of different scales. In this window we should define the data as follows:


In order to get the effect of depth and blur of objects that are further away, we should emphasize the frontal lines and weaken the posterior perspective lines. This should be done by using two tools: "Burnt Tool" and "Eraser Tool".

Please notice the areas marked with colours. When using these tools the optimal proportions are 100 pixels to the "Brush" and not more than 30% opacity.

Мы получили контурный рисунок на чисто белой поверхности. Когда рисуют на бумаге обычно видна фактура листа, а также" следы" от руки рисующего, назовем их "рабочая грязь".
Создадим это дополнение фильтром
Texturizer из набора стандартных фильтров Photoshop

In order to achieve the texture of a hand-made drawing (that includes smears and spots), we use the "Texturizer" command in the menu of the PhotoShop standard effects. The effect will apply to the whole drawing area, but in order to achieve a result as close as possible to hand-made drawings it is advisable to limit the use of this method to the immediate area of the work - by using the "Erase Tool" command.

Conclusion: it is possible to create different hues by using the "Image-Adjust-Hue / Saturation-Colorize" command as well as choosing the texture of the background upon which the object is drawn, and the manner in which the material influences the drawing.
 

20.01.2002@ Grigory Anastasiev

Home

Portfolio

Articles Tips & Tricks E-mail